About Me
- Country Princess
- Hi. My name is Kim and I have four kids. I am married and have been for 16 years. I have been doing tutorials since 2012 and I now also make kits and have been doing so for about 5 years now. Some of the tutorials I make will be with the kits I make. Some will be PTU and some will be FTU.
My Free Copyright

My Avatars

Saturday, February 18, 2012
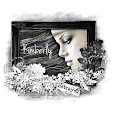
Snow Bunny Loves You

Snow Bunny Loves You
Supplies Needed
Scrapkit use is a PTU kit called Hearts of Cupid and you can get it here
Tube I am using is a FTU one and is called Snow Bunny 4 and you can get it here. We are going to be using tube #5
Let’s get started!!!!
Open a new canvas sized 750x750 with a white background
Open frame #2-C/P-Resize it by 50%-Click inside of the heart frame with your magic wand tool-Modify-Expand by 20-Highlight the background layer-Open pp#8-C/P-Invert-Delete-Select None
Highlight the frame layer-Open your tube-C/P-Resize it by 60%-Place over the top of the frame like mine-Duplicate the frame layer-Move it so it is above the tube layer-Erase the parts of the tube that are sticking out of the BOTTOM of the frame only-Highlight the Duplicated frame layer-Erase all of the top of the frame so it looks like mine-Add a drop shadow to the tube layer and the original frame layer-Merge all layers together except the background layer-Make sure to add a drop shadow to the original frame layer before you merge them together
Highlight the top layer-Open the element called Bow2-C/P-Resize it by 40%-Place it on the left side of the heart frame-Duplicate it-Mirror it-Merge them together-Add a drop shadow to it
Highlight the top layer-Open the element called Rose bead-C/P-Resize it by 30%-Place it like I have mine-Duplicate-Mirror it-Merge the two together-Add a drop shadow to it
Highlight the top layer-Open the element called Banner-C/P-Resize it by 80%-Place it like I have mine-Add a drop shadow to it
Highlight the top layer-Open the element called Cupcake-C/P-Resize it by 40%-Place it like I have mine-Add drop shadow to it
Highlight the top layer-Open the element called Cupcake Kiss This-C/P-Resize it by 40%-Place it like mine-Add a drop shadow to it
Highlight the Banner layer-Click on your text tool-Type out Snow-Use this font Saginaw-Font size should be set to 26-Font color needs to be black-Now convert it to a raster layer-Do the same thing with the words Bunny Loves You-Place each word like I have mine-Merge them all together-Add a drop shadow
Highlight your background layer-Open pp#7-Apply your mask-Merge group
Hightlight raster layer 7-Open the element called Balloons-C/P-Resize it by 80%-Place it like I have mine-Add a drop shadow to it
Now just add your name and the copyright info for the tube

Subscribe to:
Post Comments (Atom)
My Blinkie
I CT for

Blogs I Like


Blinkies


0 comments:
Post a Comment