About Me
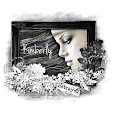
- Country Princess
- Hi. My name is Kim and I have four kids. I am married and have been for 16 years. I have been doing tutorials since 2012 and I now also make kits and have been doing so for about 5 years now. Some of the tutorials I make will be with the kits I make. Some will be PTU and some will be FTU.
My Free Copyright

My Avatars

Friday, April 20, 2012
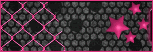
Punk Princess

Supplies
Scrapkit-I am using a FTU kit called Neon Punk and you can get it here
Tube-I am using a PTU tube called EMOlution21 and you can get it here
Template-I am using template called Hatin' by Sarah over at Sarah's Tag -N- Things and you can get it here
Plugin Needed-Penta.com Dot and Cross
Font of Choice
Mask of Choice
Let's get started!!!
Open your template-Delete the copyright info and the White Circle layer and the both lips layers
Highlight the gray circle layer-Click on it with your magic wand tool-Then highlight the blue circle layer-Hit delete on that layer-Move the blue circle layer above the gray circle layer
Use these papers and floodfill colors for these layers
Pink Circle-paper#3-Apply the default settings for the Dot and Cross plugin to this layer
Middle Rectangle-paper #7
Top Rectangle-paper #21
Bottom Rectangle-paper #21
Grey Circle-paper #2-Apply the default settings for the Dot and Cross plugin to this layer
White Outline for Text-paper #5
Merge the words layers together
Highlight the blue circle layer-Open your tube-C/P-Resize by 60%-Now highlight the blue circle layer again and duplicate it-Move the duplicated layer above the tube layer-Highlight the tube layer again-Erase her legs from the bottom of the frame like mine is-Now highlight the duplicated frame layer and delete the top part over the head of the tube
Highlight the original blue frame layer-Add a drop shadow to it
Highlight the tube layer and a drop shadow to it
Highlight the blue circle layer-Open the element called Sparkles 2-C/P-Move it to the top-Duplicate it-Mirror it-Flip it
Highlight the blue circle layer-Open the element called Sparkles-C/P-Move it to the top-Duplicate it-Mirror it-Flip it
Highlight raster 5-Open element called Flower 1-C/P-Resize by 50%-Place like mine on the left side-Duplicate it-Mirror it-Merge them together-Drop shadow
Highlight raster 7-Open element called Boot 1-C/P-Resize by 50%-Place it like mine-Drop shadow
Highlight raster 8-Open element called Bear-C/P-Resize it by 55%-Place like I have mine-Drop shadow it
Highlight raster 9-Open element called Skull2-C/P-Place like mine-Drop shadow
Hide the background layer-Merge visiable layers-Resize it by 90%-Make the background layer visible again
Highlight the background layer-Apply mask-Merge group
Now just add your name and copyright info
Subscribe to:
Post Comments (Atom)
My Blinkie
I CT for

Blogs I Like


Blinkies


0 comments:
Post a Comment