About Me
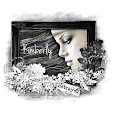
- Country Princess
- Hi. My name is Kim and I have four kids. I am married and have been for 16 years. I have been doing tutorials since 2012 and I now also make kits and have been doing so for about 5 years now. Some of the tutorials I make will be with the kits I make. Some will be PTU and some will be FTU.
My Free Copyright

My Avatars

Tuesday, June 26, 2012
Fun at the Beach

Supplies Needed
Scrapkit-I am using a PTU kit called Fun at the Beach 2 by Amy Marie. You can get it here
Tube-I am using a FTU tube from DicVicBarnes/ I am using tube #848 and you can get it here
Mask of Choice
Font of Choice
Let's get started!!!!
Open a new canvas sized 750x750 with a white background
Open Frame3-C/P-Resize by 70%-Place it in the center of the canvas-Click inside the frame with your magic wand tool-Modify-Expand by 10-Highlight the background layer-Open paper #11-C/P-Invert-Delete
Highlight raster 2-Open your tube-C/P-Resize it by 70%-Place it in the center of the frame like I have mine-Highlight the frame layer-Duplicate it-Move the original frame layer below the tube layer-Highlight the Duplicated frame layer-Erase it so that it looks like mine-Highlight the tube layer-Erase the parts that are hanging out of the bottom of the frame-Drop shadow the tube amd original frame layer
Highlight raster 2-Open Fish2 element-C/P-Resize it by 50%-Rotate it a bit to the left-Place like mine-Drop shadow it
Highlight raster 2-Open Fish1 element-C/P-Resize it by 50%-Mirror it-Rotate it a bit to the right-Place like mine-Drop shadow it
Highlight the top layer-Open the SandAM12 element-C/P-Resize it by 60%-Duplicate it-Mirror it-Merge them together-Place it like mine-Drop shadow it
Highlight raster 3-Open the SB4 element-C/P-Resize by 70%-Place it on the left side of the canvas-Rotate it a bit to the left-Drop shadow it
Hightlight raster 8-Open the SB2 element-C/P-Resize by 60%-Place it like mine-Drop shadow it
Highlight raster 9-Open the Fern element-C/P-Resize it by 80%-Place it on the right side of the canvas like mine-Duplicate it-Mirror it-Place it like mine-Merge them together
Highlight the background layer-Appy mask-Merge group
Highlight the top layer-Open the suntanlotion element-C/P-Resize by 40%-Place it like mine-Drop shadow it
Highlight the top layer-Open the Flower3 element-C/P-Resize by 40%-Place it like mine-Drop shadow it
Highlight the top layer-Open the Flower2 element-C/P-Resize by 40%-Mirror it-Place it like mine-Drop shadow it
Highlight the top layer-Open the Drink2 element-C/P-Resize by 40%-Place it like mine-Drop shadow it
Now just add your name and copyright info
Subscribe to:
Post Comments (Atom)
My Blinkie

I CT for

Blogs I Like


Blinkies


0 comments:
Post a Comment